Getting Started
Quick start
Add proxies, add a Steam account & run your first task.
This walks you through the three things every new account starts with: proxies to log in through, a Steam account to automate, and a first task to prove it all works. Takes about five minutes.
1. Add your proxies
Start here, not with accounts. SteamLabs never logs a Steam account in without a proxy, so an account with nothing available simply will not sign in.
Open Proxies under Management. Before you add anything you will see a notice that your accounts are using our shared pool. That pool works, but it is shared with every other user and it stops at 50 accounts, so add your own as soon as you can.
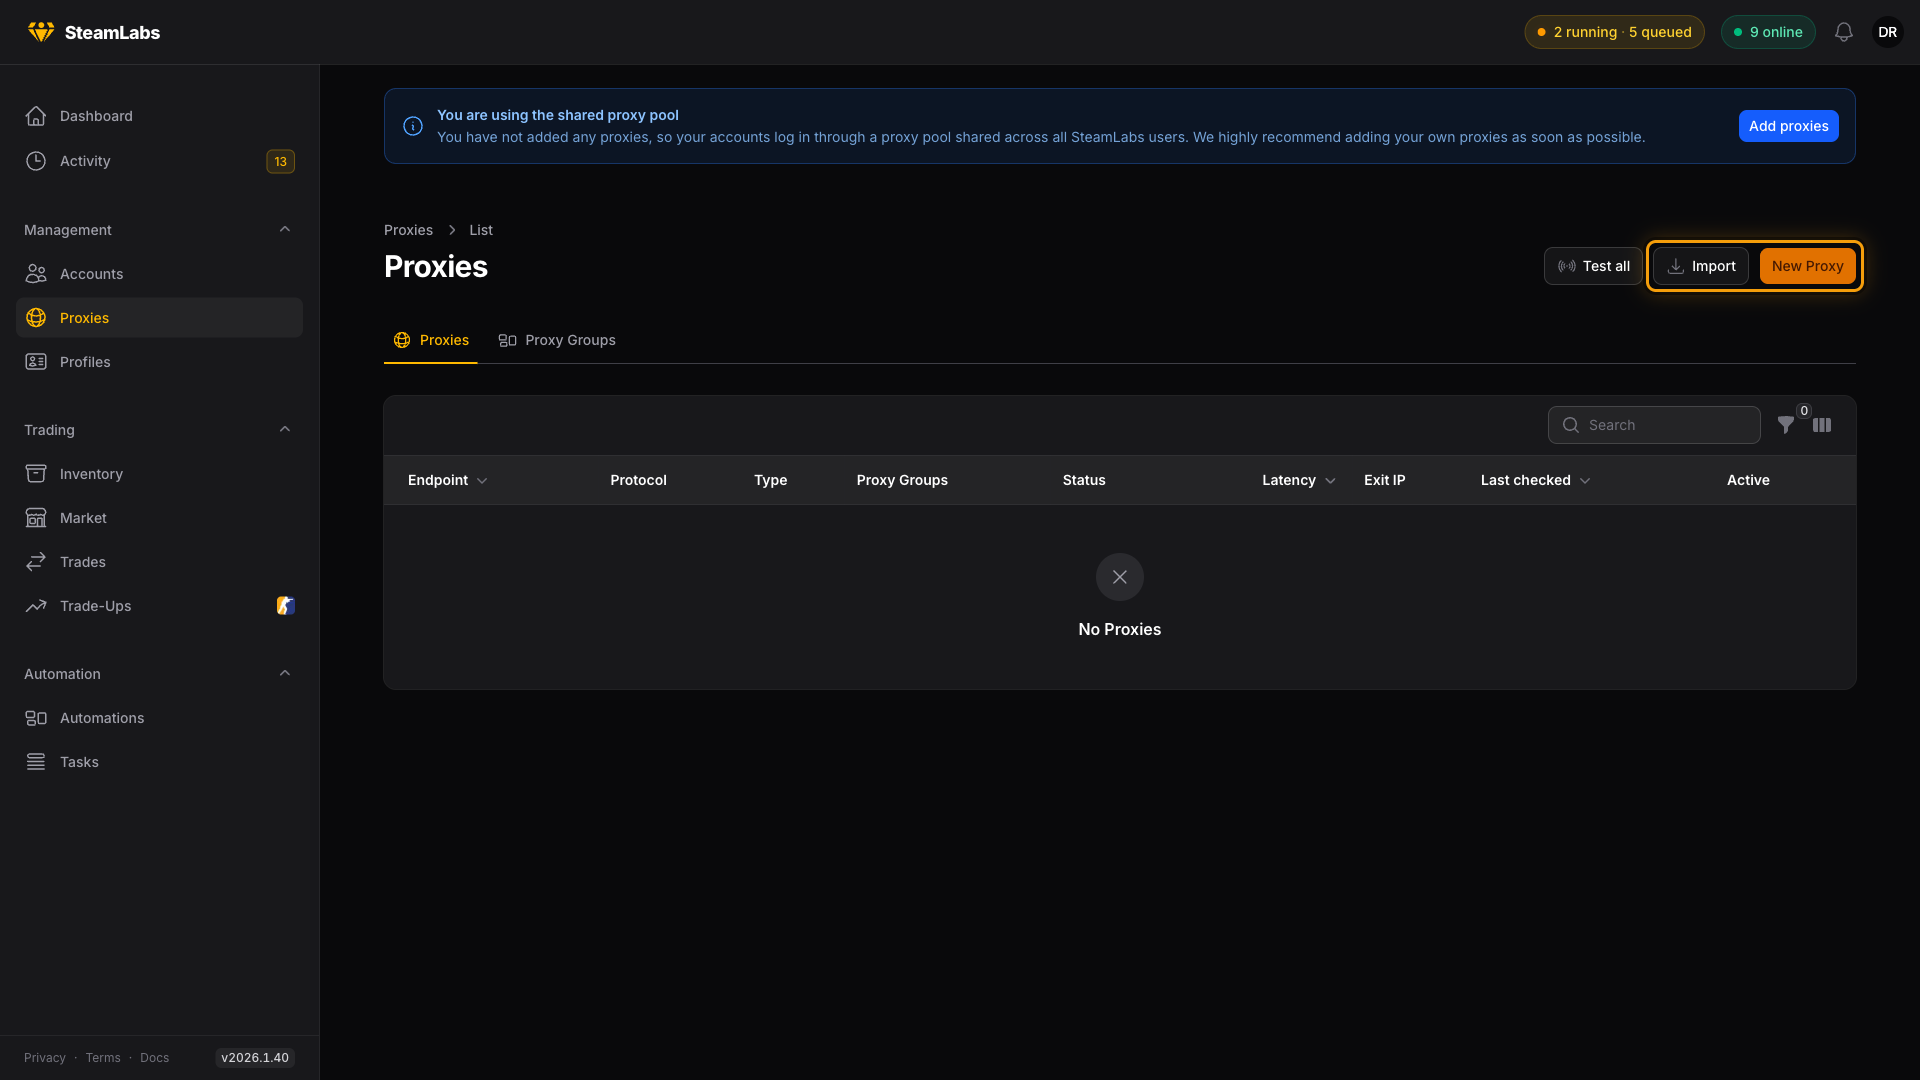
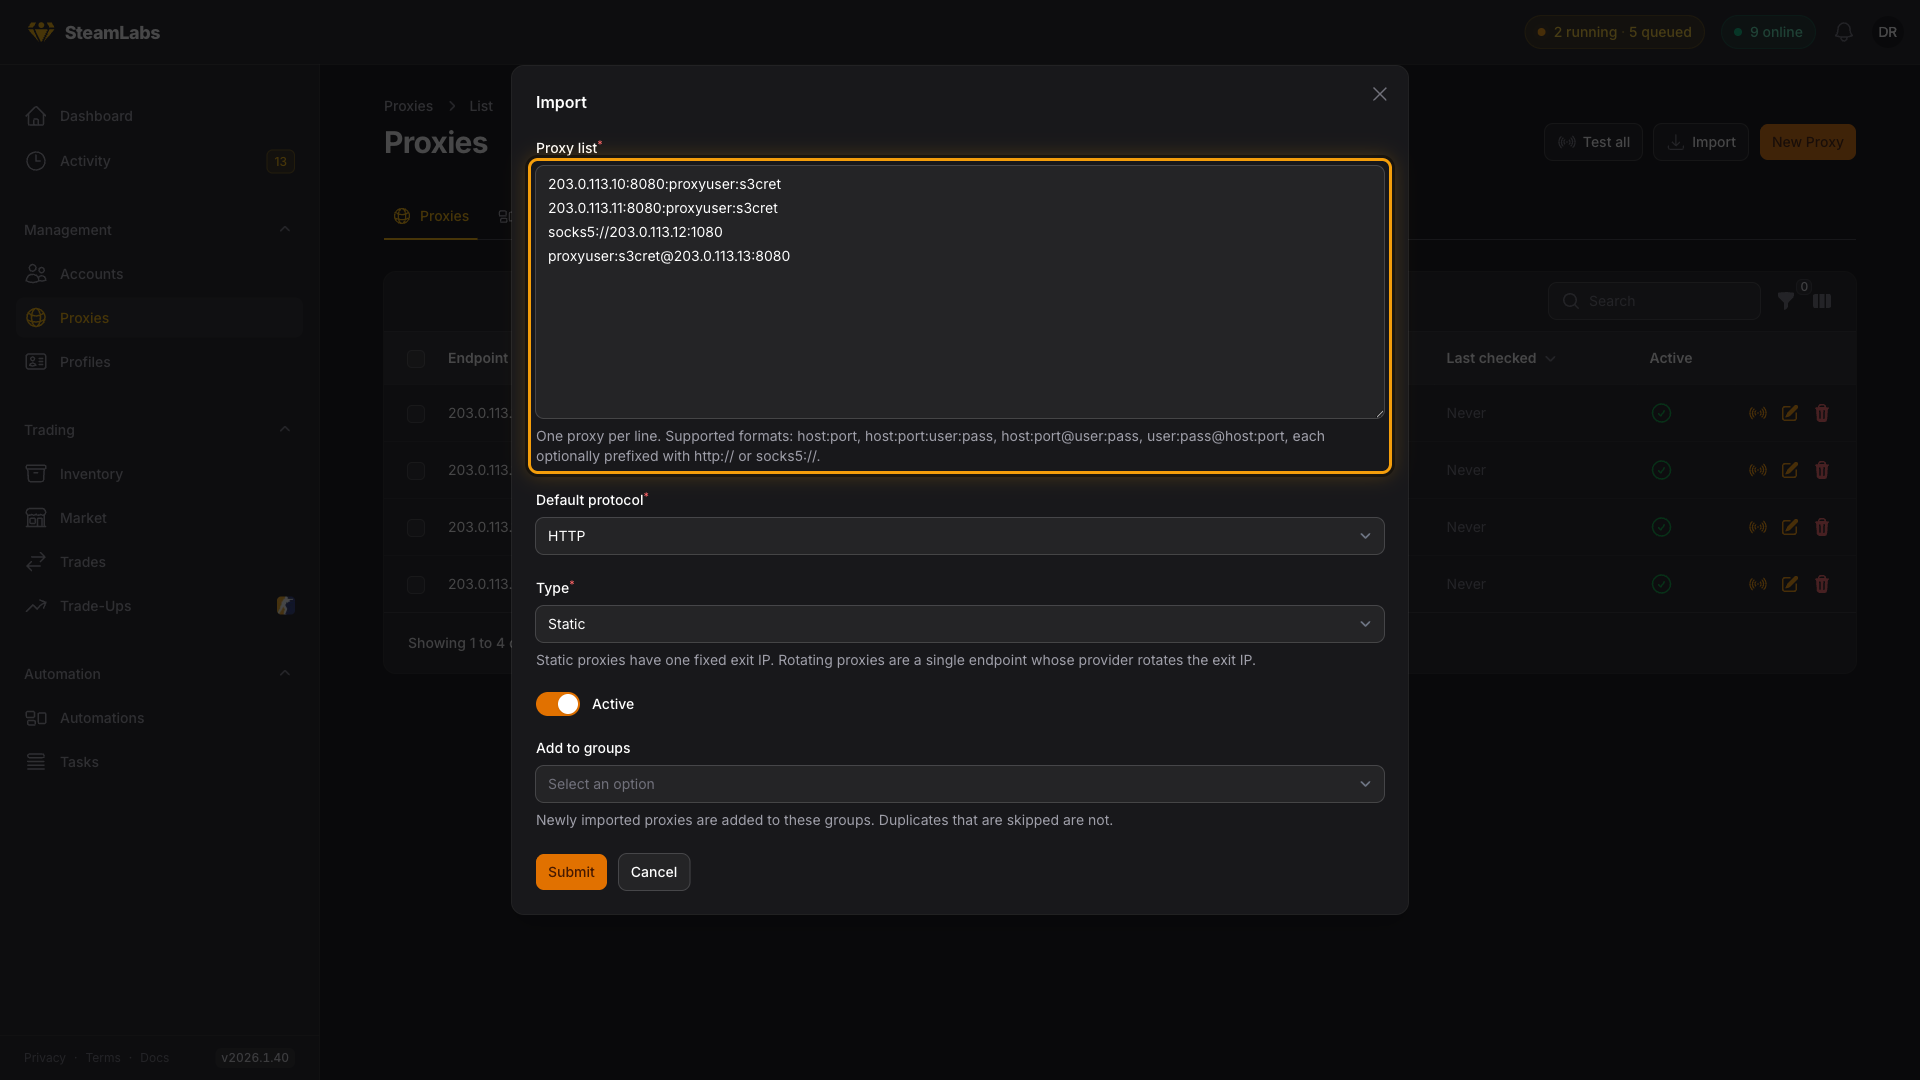
Use New Proxy for a single proxy, or Import to paste a whole list at once. Import takes one proxy per line in any of these shapes:
host:port
host:port:user:pass
host:port@user:pass
user:pass@host:port
Each line can start with http:// or socks5://. Anything without a prefix uses the Default protocol you pick in the modal, and duplicates you already own are skipped.
New proxies land in the list as Untested. Hit Test all to check them, your workers will report back latency and the exit IP each one actually comes out of.
Proxies covers testing, groups, assignment, and where to get them.
2. Add a Steam account
Go to Accounts under Management and press New Account.
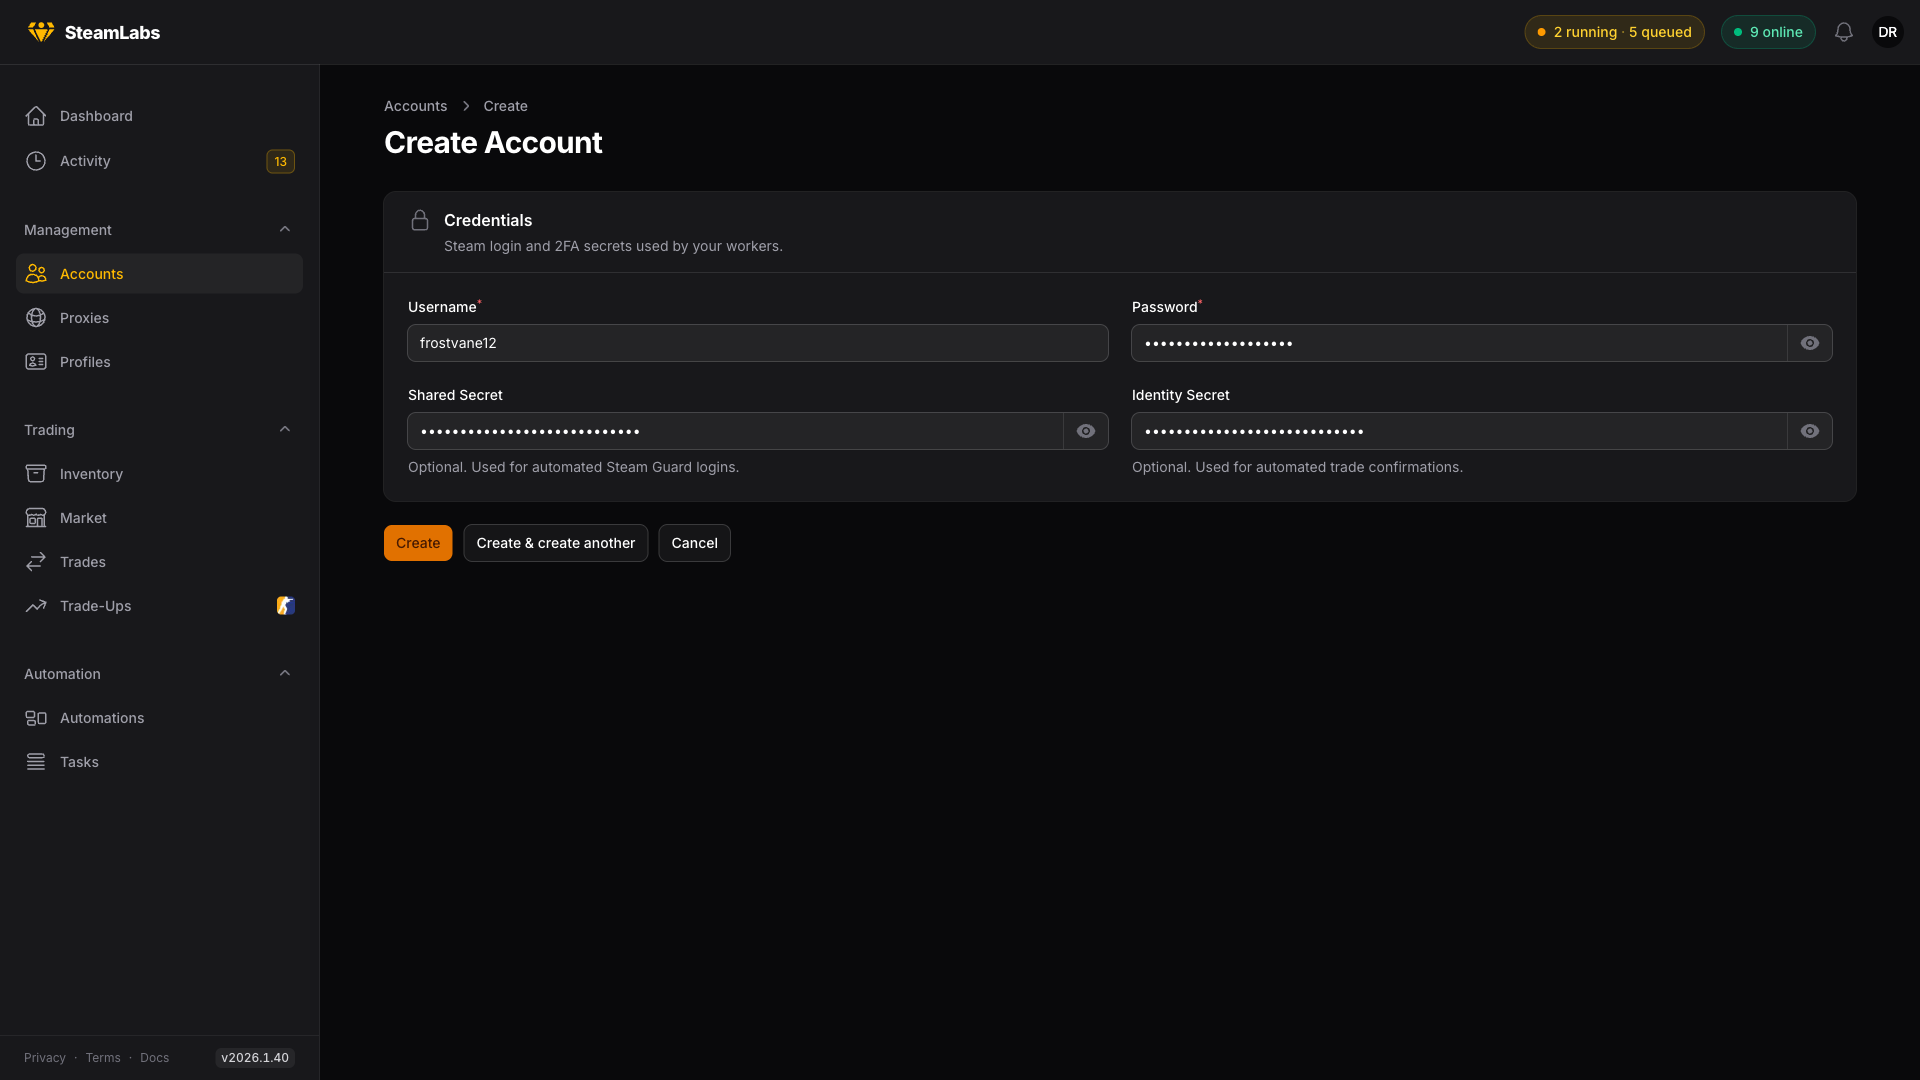
Username and Password are required. Shared Secret and Identity Secret are optional.
Use Groups under Accounts when each account should sit in one exclusive pool. An account can also stay Ungrouped. Tags remain separate, and you can add several tags to the same account.
Have more than one account? Skip the form: Import CSV takes a spreadsheet (a header row plus username and password columns, secrets optional), and Import maFiles takes your .maFile exports. maFiles carry no password, so add a passwords file alongside them with one username;password per line.
Importing more than a hundred maFiles at once? Zip them up and drop the archive into the same modal instead of picking the files one by one. Subfolders are searched too, so zipping your whole maFiles folder works, and anything in there that is not a .maFile is ignored.
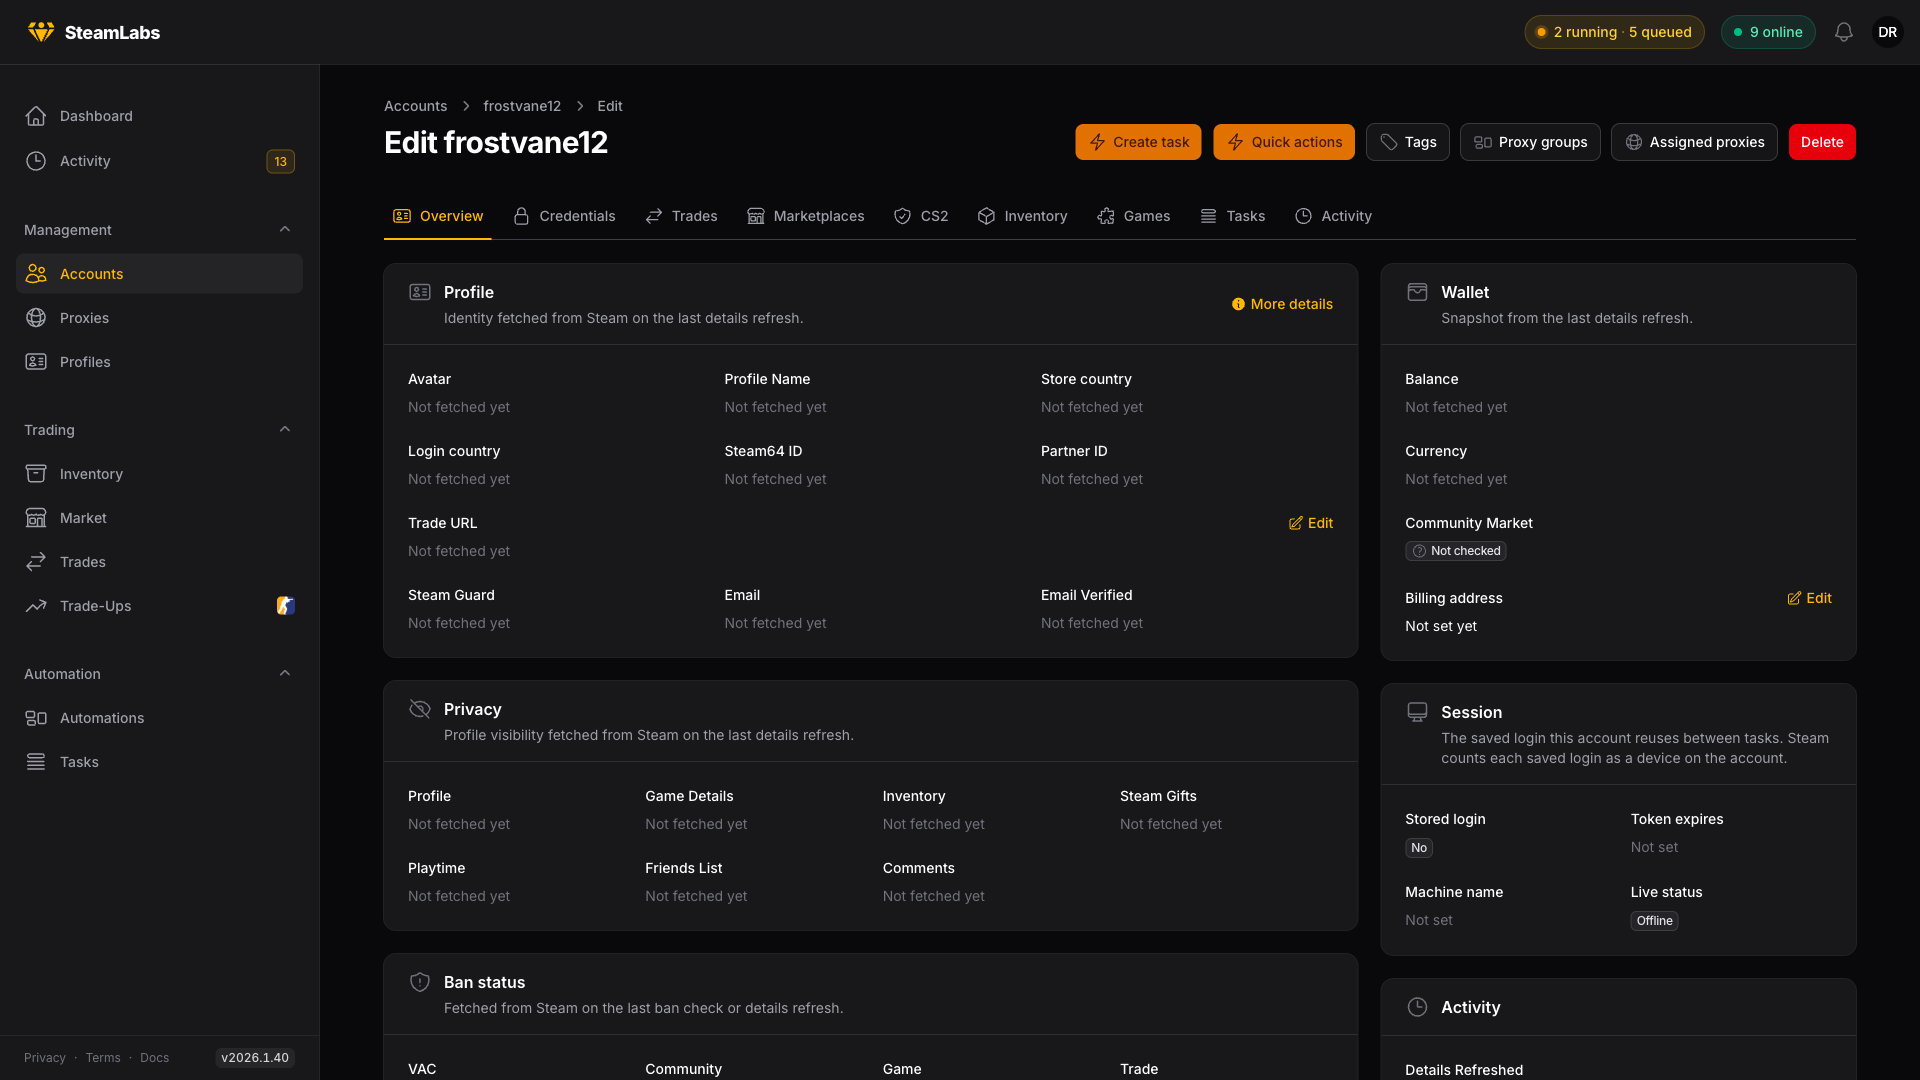
After you save, you land on the account page, and almost everything on it saids Not fetched yet. That is expected. SteamLabs has your credentials, but it has not talked to Steam yet.
3. Run your first task
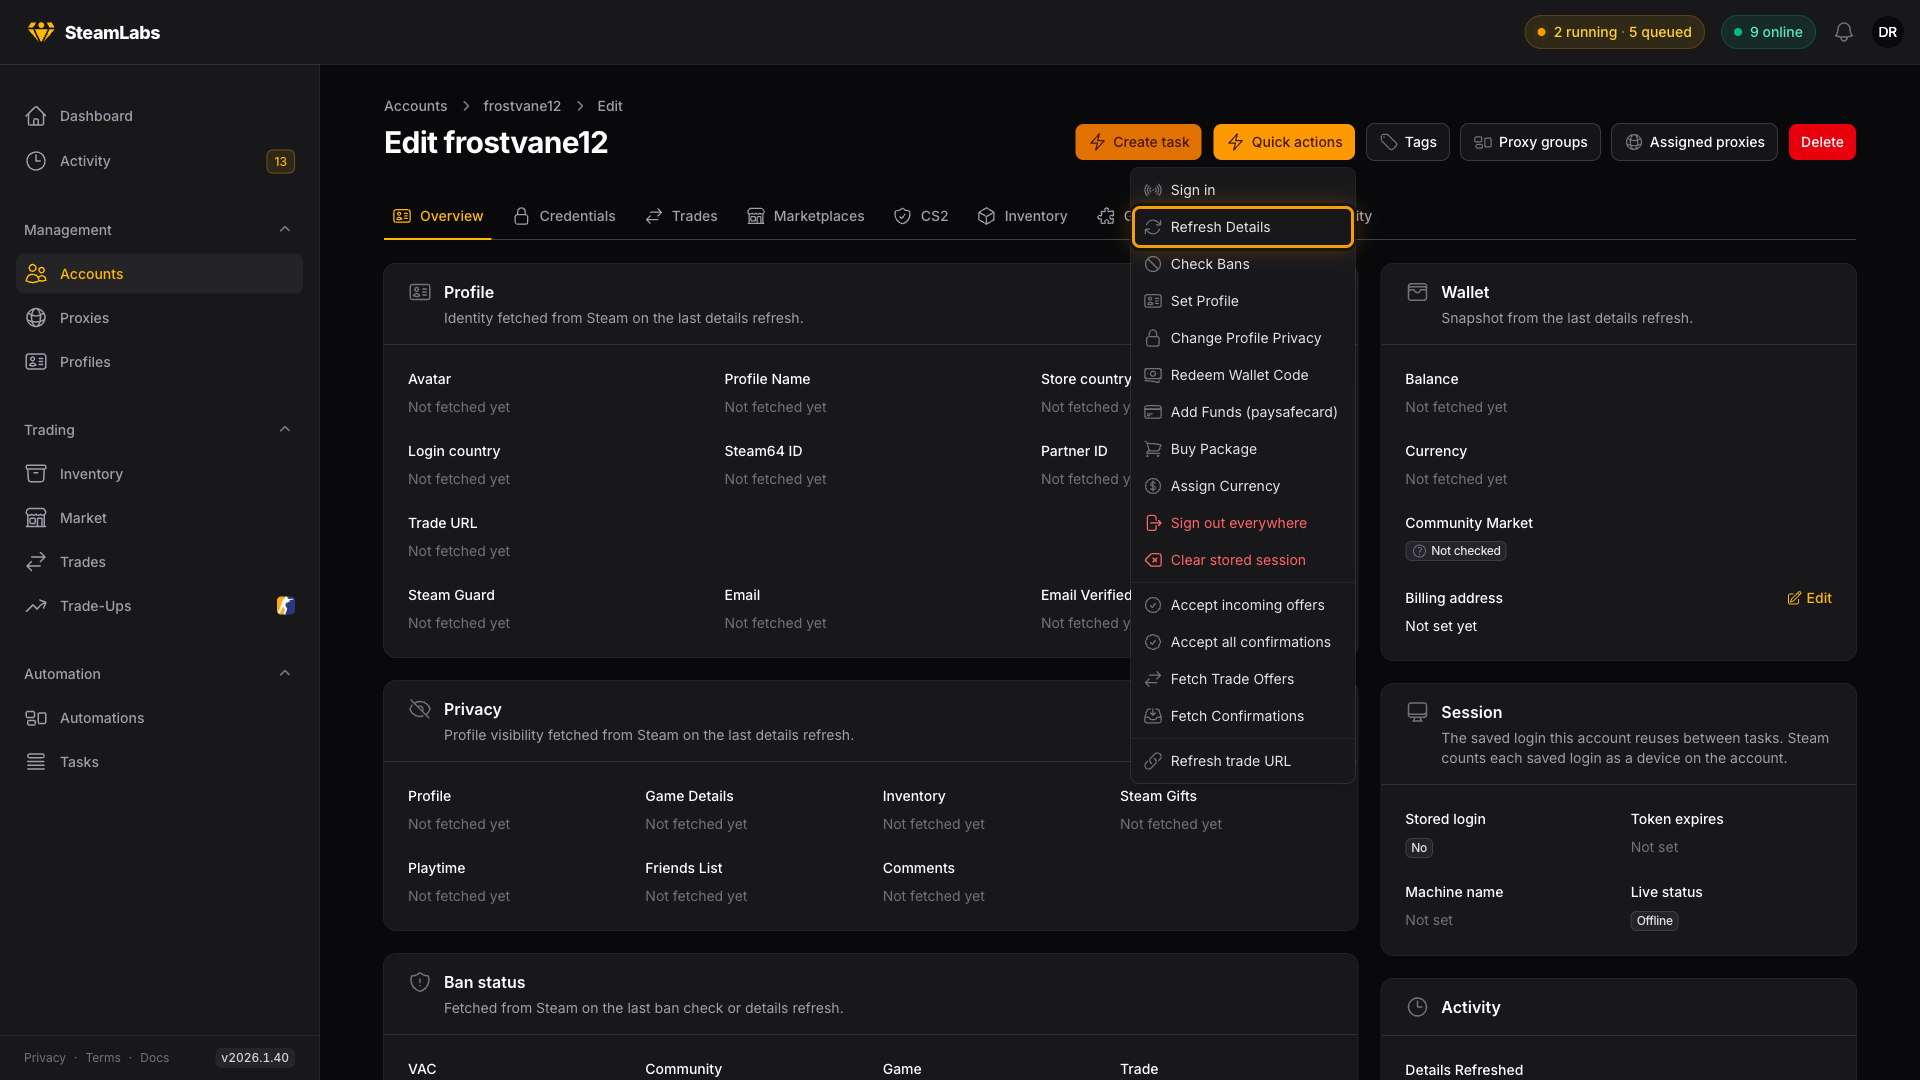
Refresh Details logs the account in and pulls back everything Steam knows about it: profile, wallet, games, bans, inventory. It is the task to run first, because most other pages stay empty until it has.
For a single account, open it and pick Refresh Details from Quick actions.
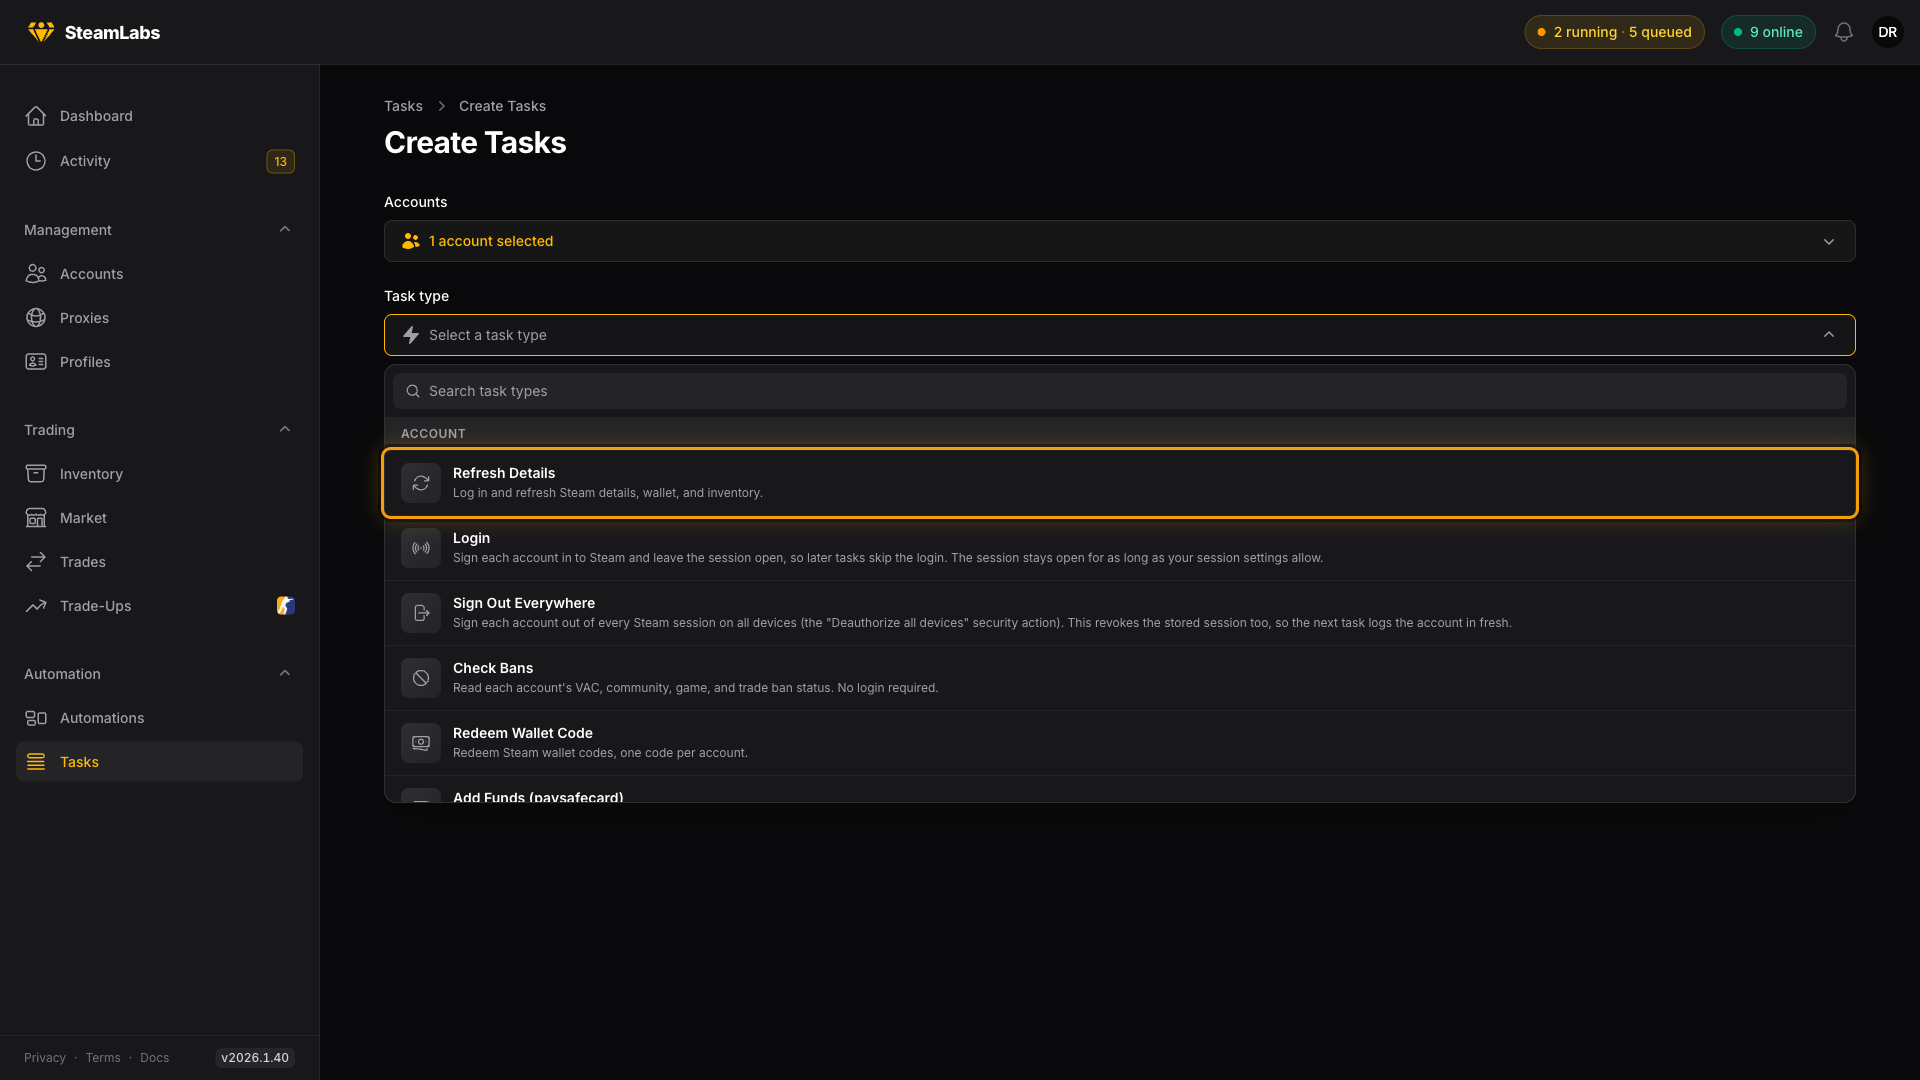
For more than one account, go to Tasks under Automation and press Create tasks: pick your accounts, then pick the type. Refresh Details sits at the top of the Account group.
Submit and you land back on Tasks with your new task queued.
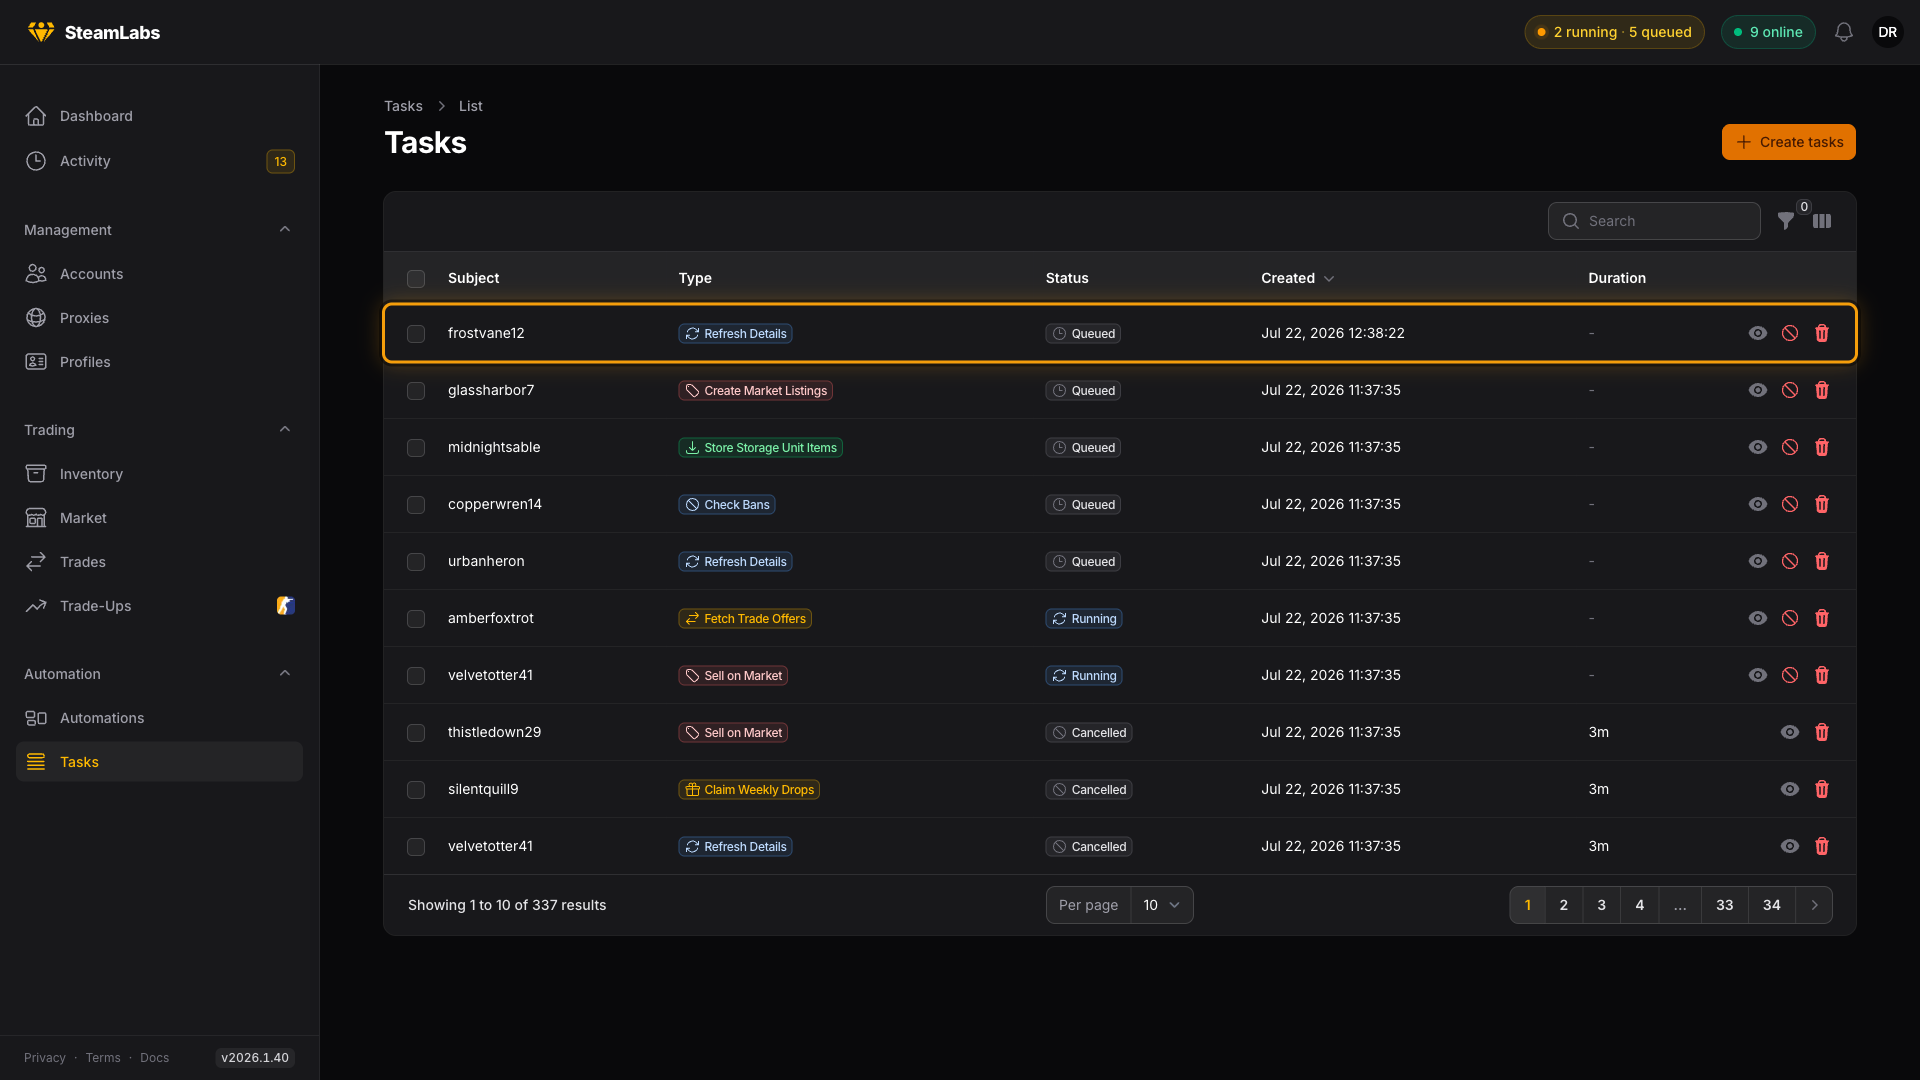
From there it moves on its own: Queued while it waits for a free worker, Running once one picks it up, then Completed or Failed. Open the task to watch its log lines stream in, along with the worker and proxy it used.
Pick the same type for several accounts and you get one batch row instead, with a live count of how many are done.
What changed
Once the task completes, go back to Accounts. The row that was empty now has an avatar, a wallet balance, an item count, and Details Refreshed has flipped from Never to a few seconds ago. Your inventory shows up under Inventory, and the account is ready for everything else: profiles, trading, selling.